How to Get HP DeskJet 2600 Wireless Printer Up and Running
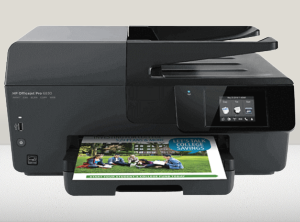
The HP DeskJet 2600 is a feature-packed, compact printer designed to meet home and small office needs. One of its standout features is wireless printing, which allows you to print directly from your devices without the hassle of cables. HP 2600 wifi setup wireless printer might seem daunting, but with this detailed guide, you can get it ready in no time. This article walks you through the entire process, from unboxing the printer to connecting it wirelessly and troubleshooting common issues.
Step 1: Unboxing and Initial Setup
Unbox the Printer
Start by carefully unboxing your HP DeskJet 2600 wireless printer. Inside the package, you should find:
- The printer
- Power cord
- Ink cartridges
- Setup guide and warranty
- Installation CD (optional)
Ensure all components are present before proceeding.
Prepare the Printer
- Remove Packing Materials:
- Open the printer and remove all tape, stickers, and packaging material from both the inside and outside.
- Connect the Power Cord:
- Plug the printer into a power outlet using the included power cord. Avoid using extension cords for better performance.
- Turn on the Printer:
- Press the power button to switch on the printer. Wait for it to initialize.
Read More: admin password for canon printer
Step 2: Install Ink Cartridges and Load Paper
Install the Ink Cartridges
- Open the cartridge access door. The cartridge carriage will move to the center.
- Remove the plastic tape from the ink cartridges. Avoid touching the copper-colored contacts or ink nozzles.
- Insert the cartridges into their respective slots. The tri-color cartridge goes into the left slot, and the black cartridge goes into the right.
- Close the cartridge access door.
Load Paper
- Open the paper input tray at the back of the printer.
- Adjust the paper width guide and insert plain, white paper.
- Align the paper properly to avoid jams.
Step 3: Wireless Setup Options
The HP DeskJet 2600 supports various methods for wireless setup. Choose the one that best suits your needs.
Method 1: Using the HP Smart App
The HP Smart app simplifies the wireless setup process and offers features like monitoring ink levels and printer status.
- Download and Install the HP Smart App:
- For smartphones and tablets: Download from the Google Play Store or App Store.
- For computers: Download the app from the HP official website.
- Prepare the Printer:
- Turn on the printer and ensure it is in setup mode. Press and hold the Wireless button until the Wireless light starts blinking.
- Connect via the App:
- Open the HP Smart app and tap on Add Printer.
- Select your printer from the list of available devices.
- Follow the app’s prompts to connect the printer to your WiFi network.
- Confirm Connection:
- Once connected, the Wireless light on the printer will stop blinking and remain steady.
Method 2: Using WPS (WiFi Protected Setup)
If your router supports WPS, you can use this method for a quick connection.
- Activate WPS on the Printer:
- Press and hold the Wireless button on the printer until it starts blinking.
- Activate WPS on the Router:
- Press the WPS button on your router within two minutes of activating it on the printer.
- Connection Confirmation:
- The printer will connect automatically, and the Wireless light will become solid.
Method 3: Using the Printer Software
For those who prefer using a computer, the printer software offers another reliable setup option.
- Download the Printer Software:
- Visit the HP support website to download the DeskJet 2600 series driver and software.
- Temporary USB Connection:
- Connect the printer to your computer using a USB cable (included or separately purchased).
- Follow the On-Screen Instructions:
- During installation, choose Wireless Setup as the connection type.
- Enter your WiFi credentials when prompted.
- Complete the Setup:
- Once the connection is established, disconnect the USB cable.
Step 4: Testing the Wireless Connection
After successfully setting up the wireless connection, it’s important to verify that the printer is working correctly.
- Print a Test Page:
- Use the HP Smart app or printer software to print a test page.
- Alternatively, press the Wireless and Information buttons on the printer simultaneously to print a Wireless Test Report.
- Check Connectivity:
- Ensure the printer appears as an available device on your computer or mobile device.
Step 5: Configuring Advanced Features
To fully utilize the capabilities of your HP DeskJet 2600, configure additional features such as HP ePrint and WiFi Direct.
HP ePrint
HP ePrint allows you to print documents and photos by sending them to your printer’s unique email address.
- Register your printer on HP Connected (hpconnected.com).
- Obtain the printer’s email address from the HP Smart app or by printing an information page.
WiFi Direct
WiFi Direct enables direct printing without a router.
- Press the WiFi Direct button on the printer to enable the feature.
- Connect your device to the printer’s WiFi Direct network.
- Print documents or photos directly.
Common Wireless Setup Issues and Solutions
1. Printer Not Detected
- Ensure the printer is powered on and in setup mode.
- Restart the printer, router, and your device.
2. Wireless Light Blinking Continuously
- Check your WiFi credentials and re-enter them if necessary.
- Move the printer closer to the router.
3. Unable to Connect to WiFi
- Reset the printer’s wireless settings:
- Press and hold the Wireless and Cancel buttons simultaneously for 5 seconds.
- Retry the setup process.
4. Slow or Intermittent Connection
- Use the 2.4GHz band for better coverage if your router supports dual bands.
- Avoid placing the printer near other electronic devices that might interfere with the signal.
Tips for Maintaining Your HP DeskJet 2600 Wireless Printer
- Regular Firmware Updates:
- Update the printer’s firmware through the HP Smart app to ensure compatibility and optimal performance.
- Proper Placement:
- Place the printer in a central location within your WiFi network’s range.
- Secure Your Network:
- Use a strong password to prevent unauthorized access.
- Clean the Printer Regularly:
- Keep the printer free from dust and debris to maintain print quality.
- Monitor Ink Levels:
- Use the HP Smart app to keep track of ink levels and replace cartridges when necessary.
Conclusion
The HP DeskJet 2600 wireless printer combines affordability and functionality, making it a popular choice for households and small businesses. Setting up the wireless connection may seem challenging initially, but with this step-by-step guide, you can complete the process with ease. Once configured, you’ll enjoy the convenience of printing from anywhere in your home or office, enhancing productivity and simplifying your printing needs.


Post Comment