How to DIY Epoxy Floor Coating: A Step-by-Step Guide
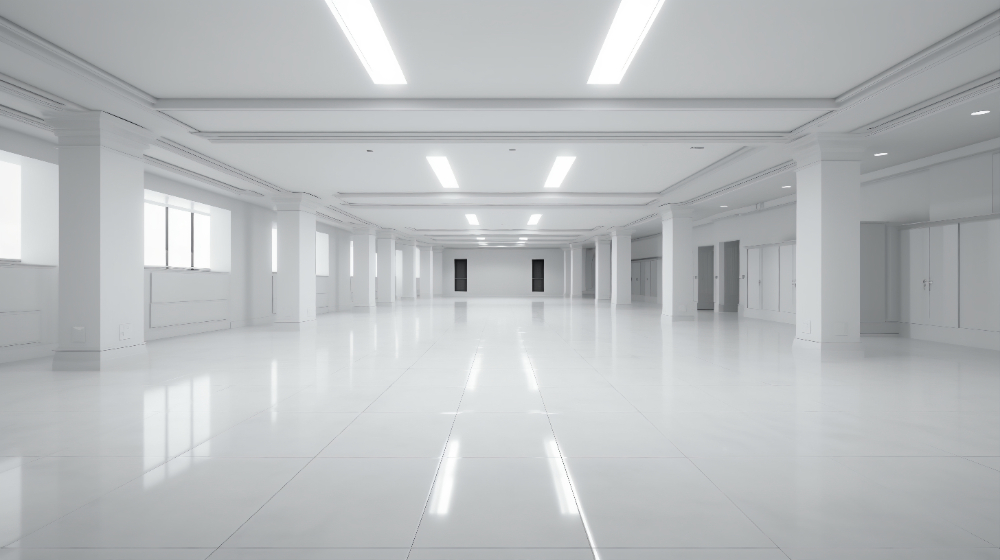
Are you tired of your dull and boring concrete floor? Are you looking for a durable, low-maintenance, and attractive flooring option for your garage, basement, or commercial space? Look no further than epoxy floor coating! This article will provide you with a step-by-step guide on how to DIY epoxy floor coating, so you can transform your space into a stunning and functional area.
Steps by step guidelines of epoxy flooring
1. What is Epoxy Floor Coating?
Epoxy floor coating is a combination of epoxy resin and hardener that creates a durable, seamless, and chemical-resistant surface when applied to concrete floors. It is commonly used in garages, basements, commercial spaces, and industrial facilities due to its high-performance characteristics and attractive appearance. Epoxy flooring can be customized with various colors, patterns, and textures, making it a versatile and practical solution for both residential and commercial applications.
2. Benefits of Epoxy Flooring
There are several benefits of epoxy flooring, including:
– Durability: Epoxy flooring is resistant to chemicals, abrasion, and impact, making it ideal for high-traffic areas and heavy machinery.
– Easy maintenance: Epoxy floors are seamless and non-porous, which means they are easy to clean and do not harbor bacteria or dust.
– Aesthetic appeal: With a wide range of colors, patterns, and finishes available, epoxy flooring can be customized to suit any design style and enhance the overall appearance of your space.
– Cost-effective: Epoxy flooring can be a more affordable option compared to other flooring materials, especially considering its long lifespan and low maintenance requirements.
– Enhanced safety: Epoxy flooring can be made slip-resistant and can also improve the brightness of your space due to its reflective properties.
3. Choosing the Right Epoxy Floor Kit
When selecting an epoxy floor kit, consider the following factors:
– Type of epoxy: There are several types of epoxy coatings, including water-based, solvent-based, and 100% solid epoxy. Each type has its pros and cons, so research which one is best suited for your specific application.
– Coverage: Make sure the epoxy floor kit you choose provides enough coverage for your project. Measure your floor area and check the product specifications for coverage information.
– Color and finish: Choose an epoxy floor kit that offers the desired color and finish for your project. Some kits include decorative flakes or metallic pigments for added visual appeal.
– Drying and curing time: Check the drying and curing time of the epoxy floor kit to ensure it fits within your project timeline.
4. Tools and Materials Needed for DIY Epoxy Floor Coating
To successfully complete your DIY epoxy floor coating project, you will need the following tools and materials:
– Epoxy floor kit (including epoxy resin, hardener, and any decorative additives)
– Concrete cleaner and degreaser
– Concrete etching solution or grinder (if necessary)
– Power washer or hose with a high-pressure nozzle
– Long-handled scrub brush
– Squeegee or wet-dry vacuum
– Paint roller with an extension handle
– Paint tray
– Mixing paddle and drill
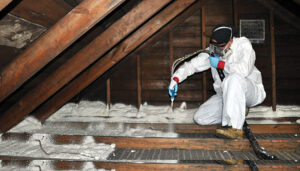
– Protective gear (gloves, goggles, and a respirator)
– Painter’s tape
5. Preparing the Surface
Proper surface preparation is crucial for the success of your DIY epoxy floor coating project. Follow these steps to prepare your concrete floor:
- Remove any existing paint, sealers, or coatings using a grinder or chemical stripper.
- Clean the surface thoroughly with a concrete cleaner and degreaser to remove any dirt, oil, or grease.
- Rinse the floor with a power washer or hose, and use a squeegee or wet-dry vacuum to remove excess water.
- If your concrete is smooth or has a glossy finish, you will need to etch the surface using a concrete etching solution or grinder to create a rough texture for better adhesion.
- Allow the floor to dry completely before proceeding with the epoxy application.
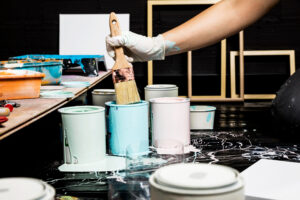
6. Mixing and Applying the Epoxy
Once your surface is prepared, follow these steps to mix and apply the epoxy:
- Read the instructions on your epoxy floor kit carefully, as mixing ratios and application methods may vary between products.
- Combine the epoxy resin and hardener in the specified ratio using a mixing paddle and drill.
- Allow the epoxy to sit for the recommended induction time (usually around 30 minutes) to ensure proper chemical reactions occur.
- Apply a thin, even coat of epoxy to the floor using a paint roller with an extension handle. Start at the farthest corner and work your way towards the exit.
- If your epoxy floor kit includes decorative additives, such as flakes or metallic pigments, sprinkle them onto the wet epoxy as you go.
- Allow the first coat to dry according to the product’s instructions before applying a second coat if desired.
7. Finishing Touches
For a professional-looking finish, consider the following optional steps:
– Apply a clear topcoat to enhance the durability and gloss of your epoxy floor.
– Use painter’s tape to create clean lines and borders, or to add decorative patterns to your floor.
– Add a slip-resistant additive to your epoxy or topcoat to improve safety.
8. Curing Time and Precautions
Epoxy flooring requires adequate curing time to achieve maximum strength and durability. Follow the curing time recommendations provided by your epoxy floor kit, typically 24-72 hours for light foot traffic and up to 7 days for heavy loads or vehicles. During the curing process, avoid exposure to moisture, direct sunlight, and extreme temperatures.
9. Maintaining Your Epoxy Floor
To keep your epoxy floor looking its best, follow these maintenance tips:
– Sweep or vacuum regularly to remove dirt and debris.
– Clean spills and stains promptly using a mild detergent and water.
– Avoid using abrasive cleaners or pads that can scratch the surface.
– Protect your epoxy floor from heavy impacts and scratches by using floor mats, padding, or furniture protectors.
Conclusion
DIY epoxy floor coating is a cost-effective and rewarding project that can transform your concrete floor into a durable, low-maintenance, and attractive surface. With the right epoxy floor kit, tools, and proper surface preparation, you can achieve professional-looking results that will enhance the functionality and aesthetics of your space for years to come. So, roll up your sleeves and get ready to give your floor the makeover it deserves!


Post Comment