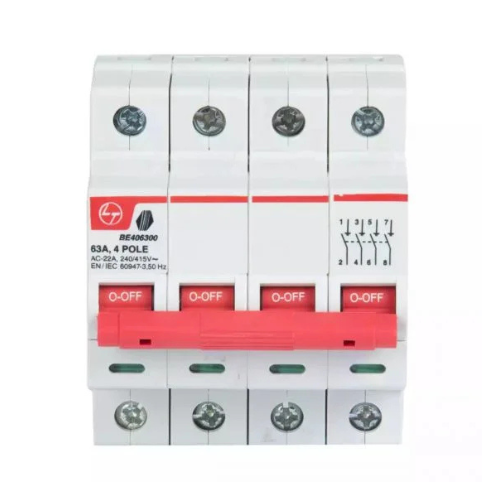
Isolator MCB Connection: Step-by-Step Guide for Safe Electrical Connections
Electrical systems are intricate networks that require careful planning, quality components, and secure connections to ensure safety and efficiency. One critical aspect of electrical installations is the isolator MCB (Miniature Circuit Breaker) connection. An isolator is a device that ensures complete disconnection of power for maintenance, while an MCB protects against overcurrent and short circuits. Together, these components play a vital role in protecting electrical systems and the people working on them.
In this guide, we’ll cover the essentials of isolator MCB connections, including their importance, the steps involved in connecting them, and safety considerations for your electrical systems.
Understanding Isolators and MCBs
What is an Isolator?
An isolator is a manually operated switch that disconnects a particular section of an electrical circuit from the power source. Its primary purpose is to ensure the safety of maintenance personnel by providing a visible break in the circuit. Isolators are typically used in high-power applications where it’s essential to isolate electrical equipment entirely.
What is an MCB?
A Miniature Circuit Breaker (MCB) is an automatically operated switch that protects an electrical circuit from damage due to overcurrent or short circuits. MCBs are a critical part of residential, commercial, and industrial systems, preventing overheating and minimizing the risk of electrical fires.
Why Use an Isolator MCB Combination?
When used together, an isolator and MCB create a robust protective setup:
- Isolator for Maintenance: The isolator disconnects the entire circuit section to allow for maintenance without risking electrical shock.
- MCB for Overcurrent Protection: The MCB trips during abnormal current flow, protecting both the circuit and connected devices.
Combining an isolator with an MCB in the same circuit creates a safer and more efficient electrical environment, especially in systems requiring regular maintenance or high-power applications.
Step-by-Step Guide to Connecting an Isolator with an MCB
Let’s explore the process of connecting an isolator with an MCB. Please note that while this guide provides an overview, it’s essential to follow all relevant local regulations and standards, and consult a licensed electrician if you’re not experienced with electrical systems.
Step 1: Gather Necessary Tools and Components
Before starting, ensure you have all the required tools and components:
- Isolator switch
- MCB of appropriate rating
- Screwdrivers (insulated for safety)
- Insulated gloves and goggles for protection
- Multimeter for checking connections
- Electrical wiring (based on your system’s specifications)
- Mounting box or distribution board if necessary
Step 2: Turn Off the Main Power Supply
Safety is paramount when working with electrical connections. Begin by switching off the main power supply to the system. Use a multimeter to ensure no live current is present in the circuit where you’ll be working.
Step 3: Select an Appropriate Location for Installation
Identify a suitable location for both the isolator and MCB. In most cases, the isolator is installed close to the power source or the equipment it controls, while the MCB is mounted in the distribution box. This setup allows easy access to the isolator for maintenance and convenient circuit protection with the MCB.
Step 4: Connect the Isolator to the Main Power Supply
Using insulated cables, connect the isolator to the main power supply. The isolator will act as a gate between the power source and the rest of the circuit. Ensure the isolator is rated appropriately for the circuit’s voltage and current requirements. Tighten all connections firmly to prevent any loose contact.
Note: Always follow color coding and wiring standards specific to your region for clear identification of live, neutral, and ground wires.
Step 5: Connect the Isolator to the MCB
Now, connect the outgoing side of the isolator to the input terminals of the MCB. This connection allows the MCB to receive power through the isolator, giving you control over the flow of electricity. Double-check that the cables are of appropriate gauge for the current capacity of the MCB.
Step 6: Wire the MCB to the Circuit
Next, connect the output terminals of the MCB to the rest of the circuit. This connection completes the circuit from the power source, through the isolator and MCB, to the devices being protected. Ensure that the wiring is securely fastened and all connections are free from any loose strands.
Step 7: Test the Circuit
After completing the connections, it’s time to test the circuit:
- Visual Check: Look over all connections to make sure they’re tight and aligned with safety standards.
- Continuity Test: Use a multimeter to perform a continuity test, ensuring there are no unintended breaks or short circuits in the setup.
- Live Test: Finally, restore the main power supply, and activate the isolator. Flip the MCB switch to confirm that it allows current to pass through as intended and that it trips if an overcurrent is simulated.
Step 8: Label and Secure the Setup
Properly label the isolator and MCB for easy identification, and ensure that all cables are organized neatly. If the system requires a protective cover, secure it in place to prevent accidental tampering.
Tips for Safe Installation and Maintenance
- Wear Safety Gear: Always use insulated gloves and goggles while working with electrical components.
- Observe Local Codes: Adhere to local electrical codes and standards to ensure compliance and safety.
- Choose Quality Components: Use high-quality isolators and MCBs that meet your system’s specifications and safety requirements.
- Schedule Regular Checks: Periodic testing of the isolator and MCB will ensure they function correctly and provide ongoing protection.
- Label Components Clearly: Labels can help maintenance personnel identify parts easily, reducing the chances of mishandling.
Selecting the Right Isolator and MCB for Your System
Choosing the right isolator and MCB combination is crucial to ensuring safe and efficient operation:
- Voltage and Current Ratings: Select an isolator and MCB with ratings that match or exceed the maximum current and voltage expected in your system.
- Type of Load: For systems with inductive loads (like motors), use MCBs with appropriate tripping characteristics, such as Type D MCBs, to handle surge currents.
- Environmental Conditions: In outdoor or industrial settings, consider using isolators and MCBs that are protected against dust, water, and corrosion.
Benefits of Using an Isolator MCB Setup
Integrating an isolator with an MCB has numerous benefits for your electrical system:
- Enhanced Safety: The isolator disconnects the circuit completely, ensuring safety during maintenance, while the MCB protects from overloads.
- Longevity of Equipment: By preventing damage due to overcurrent, the Miniature Circuit Breaker helps extend the life of connected equipment.
- Convenience: The isolator enables easy and visible disconnection of power, facilitating quicker and safer access for repairs.
Conclusion
Installing an isolator MCB connection is a wise investment for any electrical system, as it combines ease of maintenance with safety and protection. Whether for a residential setup or an industrial plant, a properly configured isolator and MCB can significantly reduce the risk of accidents, equipment damage, and energy wastage.
For reliable and high-quality isolator and MCB solutions, Lauritz Knudsen Electrical & Automation provides industry-leading options designed for durability and maximum protection. By choosing the right components and following the best installation practices, you can achieve a safer and more efficient electrical setup tailored to your needs.


Post Comment