Essential Techniques for Restoring Wall Surfaces
Overview
Ever look at your walls and think, “Wow, they need some TLC”? Cracks, dents, or holes can be such a headache. Whether it’s from kids, pets, or just age, wall damage happens. But don’t sweat it! Fixing those walls is easier than you might think.
What’s Drywall Repair?
Drywall repair is all about fixing those pesky wall imperfections. We’re talking about patching holes, smoothing out bumps, and tackling water damage. It’s like giving your walls a little makeover!
Why Bother Repairing Drywall?
You might wonder why you should even bother. Here’s the scoop:
- Makes Things Pretty: Fresh, smooth walls look so much better. Say goodbye to those eyesores!
- Boosts Value: A well-kept home attracts buyers. It can actually make your home worth more.
- Stops Further Damage: Ignoring cracks or moisture can lead to bigger problems, like mold. Yikes!
- Healthier Home: Fixing water damage keeps mold at bay. Your lungs will thank you!
- Saves Cash: Keeping up with repairs now can save you big bucks later. Trust me on this.
Types of Wall Damage
So, what kind of damage are we talking about? Here are the usual suspects:
- Holes and Dents: These happen all the time. A door hitting the wall? Classic.
- Cracks: Settling, temperature changes, or leaks can cause these. They creep up out of nowhere.
- Water Damage: Leaks lead to stains and soft spots. No fun at all.
When to Fix Drywall
Timing is everything! If you see damage, fix it ASAP. Waiting can lead to worse issues. Regular checks help catch problems early.
Getting Ready to Repair
Before diving in, let’s prepare. Here’s how to set yourself up for success:
- Safety First: Put on goggles, gloves, and a mask. Protect yourself from dust and debris.
- Clear the Area: Move furniture and decorations away. You’ll want a clean workspace.
- Inspect the Damage: Look closely at the area. Figure out what needs fixing.
Supplies You’ll Need
Here’s a quick shopping list for your drywall repair:
- Drywall Patch or Compound: Pick one that fits your needs.
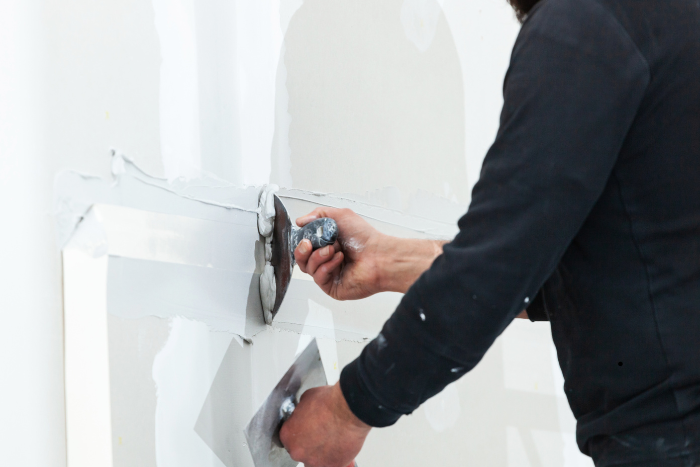
- Drywall Knife: A good knife helps you apply compound smoothly.
- Sandpaper: Grab fine-grit sandpaper for finishing touches.
- Primer and Paint: These will help blend your repair with the rest of the wall.
- Dust Mask: Keep the dust out of your lungs while you work.
Repair Techniques You’ll Use
Ready to get hands-on? Here are some easy techniques:
- Patching Holes: For small holes, just apply the compound. Larger ones need a patch.
- Filling Cracks: Use flexible compound for cracks. It needs to adhere well.
- Smoothing Out: After applying, smooth it out with your knife.
- Sanding: Once it dries, sand it down until it’s flush with the wall.
- Finishing Touches: Don’t forget to prime and paint for a seamless look.
Equipment for the Job
Depending on what you need, here’s what might come in handy:
- Repair Kits: These usually have everything you need for small fixes. Super convenient!
- Electric Sander: If you’re dealing with big Drywall Repair Services, this can save a lot of time.
- Joint Tape: Great for reinforcing seams or larger patches.
Tips for a Smooth Repair
Here are a few extra tips to make your repair process easier:
- Take It Slow: Work in small sections. Don’t rush it!
- Drying Time Matters: Let each layer dry fully. Patience pays off.
- Enjoy the Process: Fixing things can be oddly satisfying.
Things to Keep in Mind
Before you start, remember these key points:
- Moisture Issues: Fix leaks first. Repairing without addressing moisture is just asking for trouble.
- Texture Matching: If your walls have texture, try to mimic it. This keeps things looking uniform.
- Structural Integrity: If the damage is serious, don’t hesitate to call in a pro. It’s better to be safe than sorry.
Safety Tips While Repairing
Safety is a must! Here are some tips to keep you safe:
- Use the Right Tools: Always use tools that are in good shape. No one wants an accident!
- Ventilate: Keep the area airy. Dust can get overwhelming.
- Watch for Wires: Check for electrical wires behind the drywall before cutting or drilling.
DIY or Call a Pro?
If you’re feeling confident, go for it! DIY repairs can be fun and rewarding. But if you’re unsure, hiring a pro can save you headaches down the line. They know their stuff!
Conclusion
Drywall repair is a great way to keep your home looking fresh and inviting. Follow these tips, and you’ll be well on your way to achieving beautiful results. Just remember to prioritize safety and tackle those issues as they arise! Happy repairing!
FAQs About Drywall Repair
1. What tools do I need for drywall repair?
You’ll need a drywall knife, sandpaper, a drywall patch or compound, primer, paint, and safety gear like gloves and goggles.
2. How do I know if I need to repair my drywall?
Look for cracks, dents, holes, or water stains. If you see any of these, it’s time to take action.
3. Can I repair drywall myself?
Absolutely! Many drywall repairs are simple DIY projects. Just follow the steps carefully, and you’ll do great.
4. How long does it take for the compound to dry?
Drying times can vary, but typically, it takes about 24 hours for the compound to dry completely. Always check the product instructions.
5. What if I have a large hole in my drywall?
For large holes, use a drywall patch. Cut a piece of drywall to fit, secure it, and then apply compound around the edges.


Post Comment